Likewise, we will also list out the instructions regarding how to temporarily boot your device to TWRP or permanently flash it. We will also focus on A/B vs A-only partition devices and check out how does this affect the custom recovery flashing process. So without further ado, let’s start off the guide as to which command should you use fastboot flash recovery twrp.img or fastboot boot twrp.img. Follow along.
Fix TWRP Error 7 (While Flashing Custom ROM via TWRP)How to Update Magisk ZIP and Magisk Manager (without TWRP)How to Fix TWRP Error 70 [With Screenshots]Fix TWRP Error 20 GApps after flashing LineageOS
The A/B Partitions in Android
Alongside Android 8.0 Oreo we got a bunch of major technical changes. For the general users, this was mostly under the hood and didn’t matter much. But for the tech enthusiasts, this was among the most important changes to this open-source OS to date. Let’s understand this change with the help of a real usage experience. You might remember how in earlier times, once you have downloaded the OTA, you have to wait for ages for the update to install. During the entire installation process, your device was hijacked by this update and you couldn’t do any task. Even when the update was finished and your device rebooted, the OS began optimizing the apps one at a time. This again took a very time to complete. However, with the introduction of the A/B Partition scheme, all these changed and you could now install the OTA without any interruptions as such. So how this came into the picture? Well, your device now has two partitions for bootloader, boot, radio, system, and vendor. So suppose your device is currently booted to Partition A, hence this will be your current active slot. As and when you get the OTA and you install it, it will be installed to Partition B (which will be your inactive slot as of now). Since the update is installed to the inactive slot, you could continue using the device without any issue. Then when you are done with the work, you just need to reboot your device. Upon the reboot, the slot change will take place. As a result, your active partition (which was slot A) now becomes the inactive partition and the inactive partition (which was slot B) becomes the current active partition. And since this newly active slot B had the OTA installed, your device is now running the latest update!
How is TWRP affected by A/B Partition?
As mentioned before, with an A/B partition, your device got two partitions for bootloader, boot, radio, system, and vendor. But did you noticed that the recovery partition was missing? Yes, it’s true. It’s not because there is only one recovery partition, rather there’s a more drastic change. The recovery partition has been removed in A/B partition devices.
This is because most tasks handled by the recovery partition was now taken care of by the system update engine. Hence it was no longer. So all this lead gave birth to the fastboot boot twrp.img command, in addition to the fastboot flash recovery twrp.img command that was already there. The below section should make it all very clear.
[GUIDE] Flash ROMs/Magisk/TWRP/Kernels on A/B Partition DevicesInstall Custom ROMs on any Android Device- Includes A/B PartitionHow to Flash Various Files in A/B Partition DevicesHow to Replace LineageOS Recovery with TWRP
What does the fastboot boot twrp.img command means
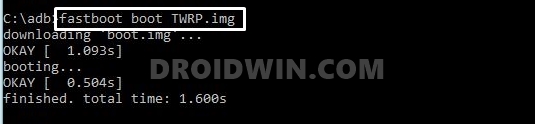
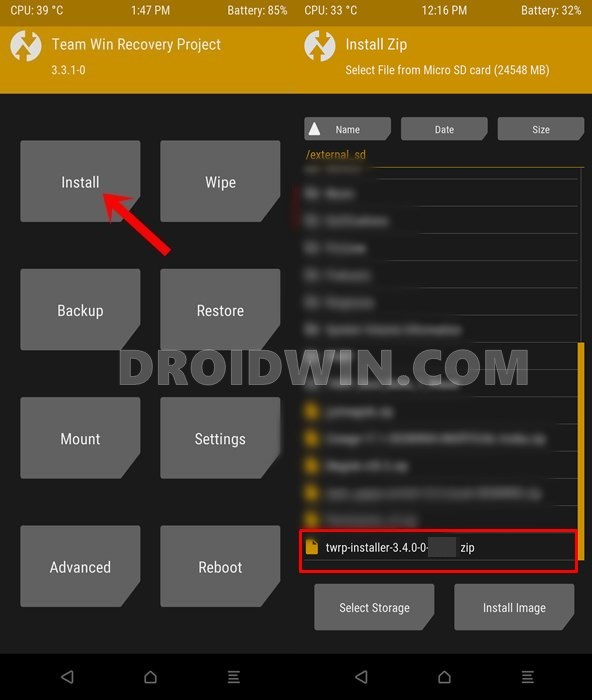
Since the A/B partition devices no longer have a recovery partition, hence you cannot directly send TWRP to the recovery partition via the fastboot flash recovery twrp.img. Rather you will have to send it to the boot partition first so that your device boots to the TWRP. For that, you will use the fastboot boot twrp.img command. However doing so will only temporarily boot your device to TWRP, it hasn’t been permanently installed. Hence to permanently install it, you will have to flash the TWRP ZIP file right from the booted TWRP itself.
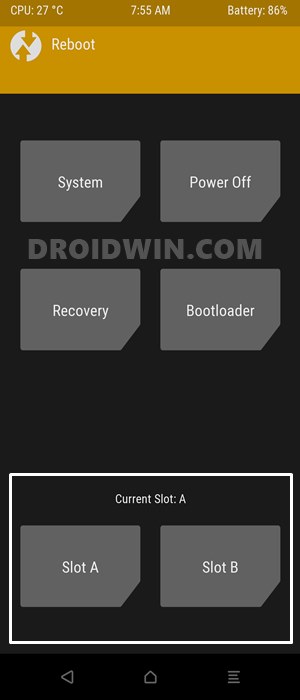
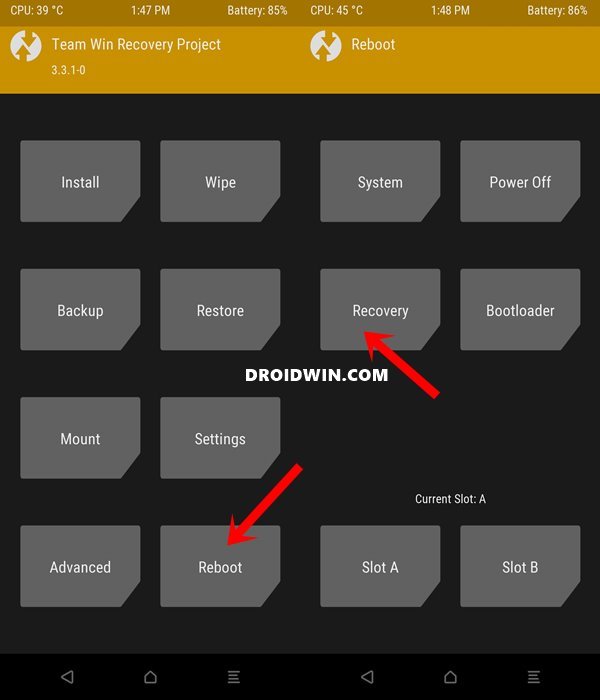
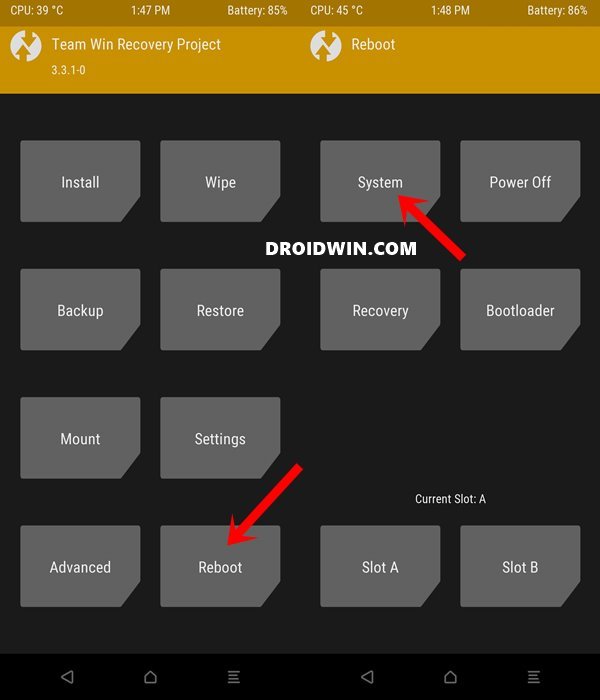
Once you do so, TWRP recovery will have made a permanent place in your device. Furthermore, once you have flashed the TWRP ZIP file, you should reboot your device back to Recovery rather than directly to the System. The reason? Well, as of now the recovery is flashed to the inactive slot. Hence to change the partition and switch to the other slot where TWRP is installed, you will have to reboot your device back to Recovery. Once you again boot to the recovery, you may then reboot to the OS.
What about the fastboot flash recovery twrp.img command
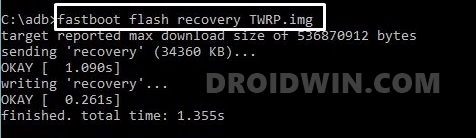
Well, this command is used by the A-only devices. This is because these devices have a dedicated recovery partition and you could directly send TWRP to the recovery partition. As a result, you just have to use the fastboot flash recovery twrp.img command and the TWRP will be permanently installed onto your device. As simple as it gets, isn’t it?
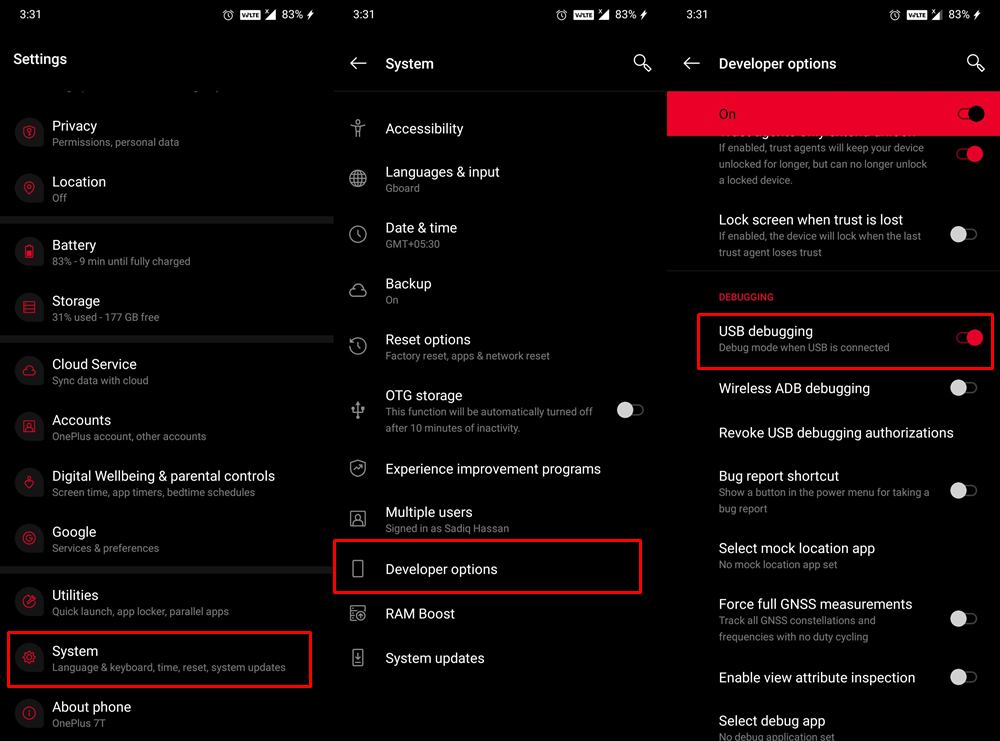
How to Check if my Android Device is A-only or A/B Partition
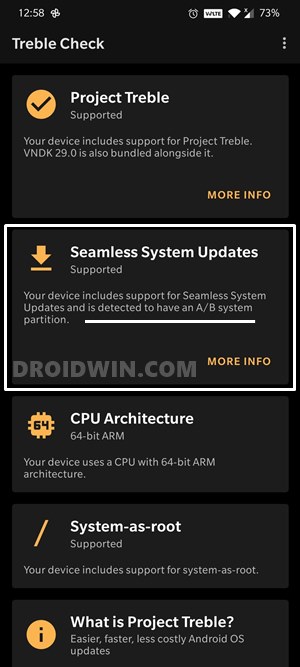
So before listing out the TWRP installation instructions, it is of paramount importance to know if your device is an A/B partition or A-only. For that, download and install the Treble Check app from Play Store. Launch it and then check the Seamless System Updates section. It will let you know if your device has an A/B system partition or the A-only system partition.
How to Install OTA Updates in Rooted Android DeviceHow to Extract payload.bin and get stock boot image fileSteps to Flash magisk_patched.tar (patched Samsung AP file) via OdinHow to Patch Samsung AP Firmware via Magisk
Which TWRP Command Should I use: fastboot flash vs fastboot boot
Now that you know the partition scheme of your device, it’s time to check out the TWRP installation steps. So here’s the answer to which command should you use out of fastboot flash recovery twrp.img and fastboot boot twrp.img. If your device has an A/B partition scheme, then you will have to first boot your device to the TWRP Recovery via its IMG file. After this, you could permanently flash it via installing the TWRP ZIP File. On the other hand, if you have an A-only device, then you could directly flash the TWRP IMG file. Detailed instruction steps for both are given below.
Fix Android Device stuck in Fastboot ModeHow to Root Android Devices via TWRP RecoveryRoot Android Devices Without TWRP RecoveryHow to Root any Samsung device via Magisk and Odin
How to Flash TWRP in A/B Partition Devices
How to Downgrade Samsung from Android 11 to Android 10 (OneUI 3.0 to 2.0/2.5)Root Google Pixel 5 via Magisk without TWRP (Android 11)How to Pass Magisk SafetyNet on Rooted Android 11Fix Magisk patched boot.img issue while Rooting Android 11
How to Install TWRP in A-only Partition Devices
Installing TWRP on A-only devices is quite simple since your device already has the recovery partition. With that said, here are the required instructions:
Can I Directly Flash TWRP even in A/B Partition Devices?
So till now, we have discussed that the A-only partition devices could directly flash the TWRP whereas A/B devices first require to boot to TWRP and then permanently install it. So as a general rule of thumb, it means that A/B devices would have both the TWRP IMG and ZIP whereas the A-only device will have just the TWRP IMG file. Well, that is true, but a little bit of twist. Some devices (such as Moto One Action) might just have the TWRP IMG file but still would be A/B partition. So how would you then permanently install TWRP then? In those cases, you will have to use Ramdisk on your device and flash TWRP IMG file after booting to TWRP. If you wish to know more in this case, then you should definitely check out this guide: How to Permanently Install TWRP without TWRP ZIP File (only using TWRP.img file). So with this, we conclude the guide on TWRP: fastboot flash vs fastboot boot commands. If you still have any queries regarding the aforementioned explanations, feel free to reach out to us via the comments section. We will get back to you with a solution at the earliest.
About Chief Editor