All that is needed is an unlocked bootloader. Once you do so, you will be in a position to try out a plethora of mods. But for that, you would need a working custom recovery as the fastboot commands aren’t able to flash all the binaries. Moreover, the ease of flashing is much more with these recoveries than compared with the commands. All these reasons result in the inclination of the users towards trying out the recoveries. In this regard, there’s some good news in store as you could now install the TWRP Recovery on Poco F3 / Mi 11X / Redmi K40 devices. And in this guide, we will show you how to do just that. So without further ado, let’s get started.
Benefits and Risks of TWRP Recovery
Once you install the TWRP Recovery onto your device, you will be able to flash various types of flashable ZIPs. Likewise, you could also create and restore the backup of device partitions via the Nandroid Backup. Then there’s also an option to wipe data, system, and other partitions that will come in handy while flashing a custom ROM. Likewise, you could also mount external devices, execute commands via terminal, switch slots, and carry out other related tasks. On the flip side though, it does have a few drawbacks as well. To begin with, flashing a custom recovery requires an unlocked bootloader, which will wipe off all the data on your device. Furthermore, at the time of writing, the recovery is an unofficial build, so you might experience a few bugs as well. So if that’s all well and good, then let’s get started with the steps to install the TWRP Recovery on Poco F3 / Mi 11X / Redmi K40.
How to Install TWRP Recovery on Poco F3 / Mi 11X / Redmi K40
While the below-attached video is for Poco F4 but the same steps are applicable to your Poco F3 as well. The below instructions are listed under separate sections for ease of understanding. Make sure to follow in the exact same sequence as mentioned. Droidwin and its members wouldn’t be held responsible in case of a thermonuclear war, your alarm doesn’t wake you up, or if anything happens to your device and data by performing the below steps. Furthermore, here are some important points that deserve your attention:
If you want to format data ‘after’ flashing a ROM, then first reboot to recovery and then perform the format.If you want to flash Magisk via recovery (though it’s not recommended as of now), then please uncheck the “Inject TWRP after Install” option, or else TWRP will remove Magisk.Moreover, after flashing the ROM, reboot your device to Recovery and then only flash the Magisk ZIP.
STEP 1: Install Android SDK
First and foremost, you will have to install the Android SDK Platform Tools on your PC. This is the official ADB and Fastboot binary provided by Google and is the only recommended one. So download it and then extract it to any convenient location on your PC. Doing so will give you the platform-tools folder, which will be used throughout this guide.
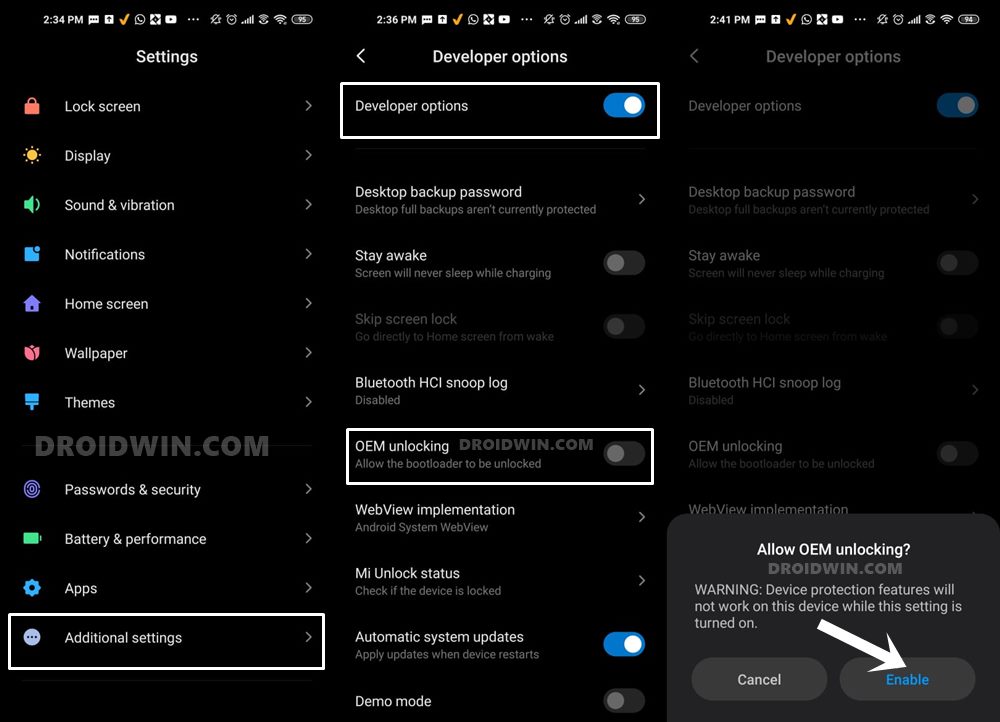
STEP 2: Enable USB Debugging and OEM Unlocking
Next up, you will also have to enable USB Debugging and OEM Unlocking on your device. The former will make your device recognizable by the PC in ADB mode. This will then allow you to boot your device to Fastboot Mode. On the other hand, OEM Unlocking is required to carry out the bootloader unlocking process.
So head over to Settings > About Phone > Tap on Build Number 7 times > Go back to Settings > System > Advanced > Developer Options > Enable USB Debugging and OEM Unlocking.
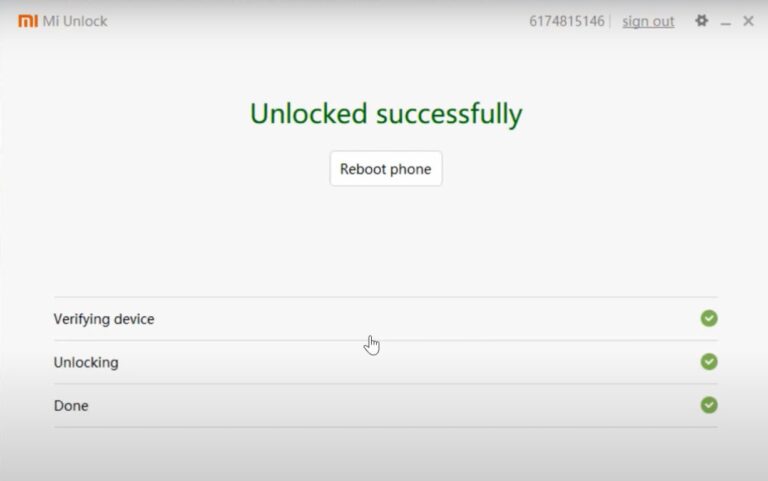
STEP 3: Unlock the Bootloader on Poco F3 / Mi 11X / Redmi K40
You will also have to unlock the bootloader before you install the TWRP Recovery on Poco F3 / Mi 11X / Redmi K40 devices. Do keep in mind that doing so will wipe off all the data from your device and could also nullify the device’s warranty. If that’s well and good, then please refer to our detailed guide on How to Unlock the Bootloader on any Xiaomi Device.
STEP 4: Download TWRP for Poco F3 / Mi 11X / Redmi K40
You may now grab hold of the TWRP Recovery for your device from the below link. Credits: XDA Senior Member Vasishath. This TWRP version has been successfully tested on Mi11x (aliothin), though it may also work on Poco F3 and Redmi K40 (alioth). However, if you are on Poco F3, then you may also try this TWRP version by the popular developer Mauronofrio: TWRP for Poco F3.
TWRP Recovery for Poco F3 / Mi 11X / Redmi K40: Download Link
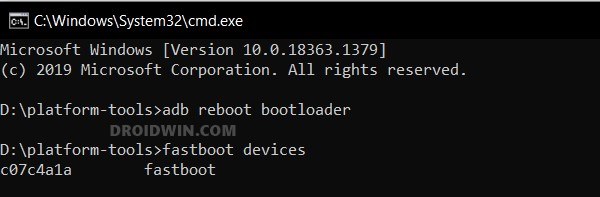
STEP 5: Boot to Fastboot Mode
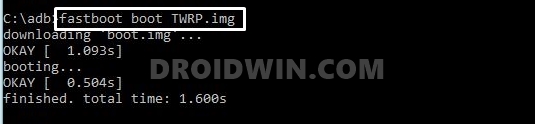
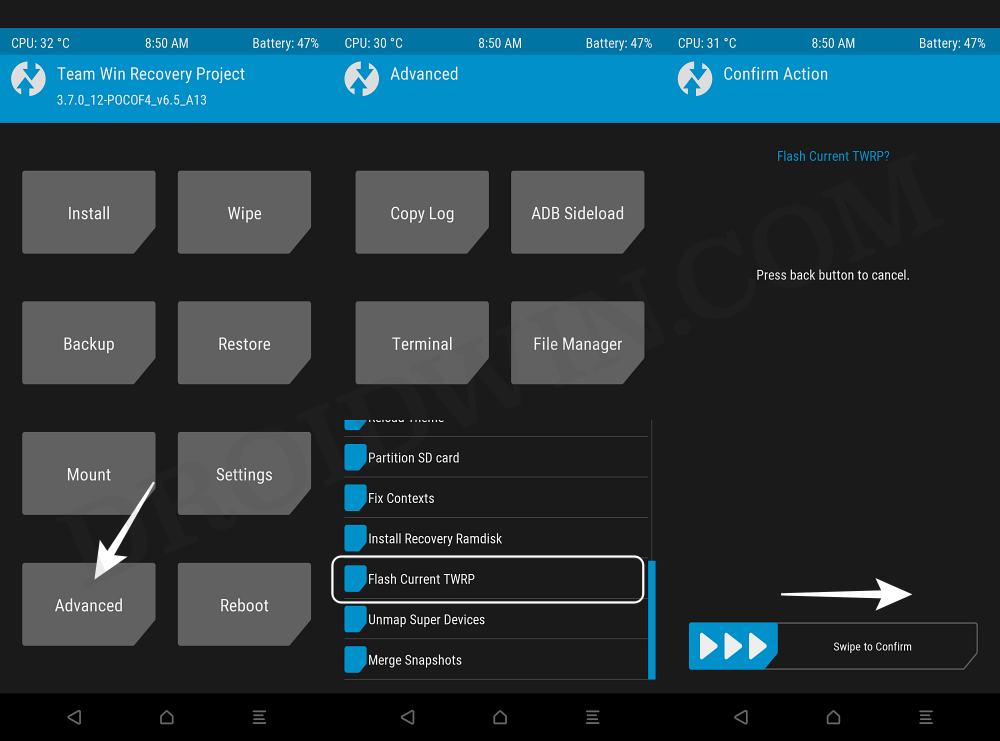
STEP 6: Install TWRP Recovery on Poco F3 / Mi 11X / Redmi K40
So with this, we conclude the guide on how you could install the TWRP Recovery on Xiaomi Poco F3 / Mi 11X / Redmi K40. If you have any queries concerning the aforementioned steps, do let us know in the comments. We will get back to you with a solution at the earliest.
Root Poco X3 NFC without TWRP using stock boot.img fileDowngrade Xiaomi Poco X3 Android 11 Beta to Android 10How to Install OrangeFox Recovery on Poco X3How to Fix Black Crush Pixel Display Issue on Xiaomi Mi 11 Lite
About Chief Editor