Along the same lines, these devices have been regular visitors to custom development. There are a plethora of mods and tweaks that you could try out onto your device. Once you complete the sole prerequisite aka unlock the bootloader, then you would have opened the floodgates to customizations. These include the likes of replacing the device’s stock recovery with a custom one or gaining access to the system partition by rooting the device via Magisk. Once rooted, you will be able to flash Magisk Modules, Xposed Frameworks or Substratum Themes. Talking about the benefits of TWRP, well you could create and restore Nandroid Backups, flash ZIP and IMG files, use the in-built terminal to execute commands, fix recovery bootloop, wipe device partitions, and the list goes on. So if you are looking to welcome these features onto your device, then you have come to the right place. Given here are the detailed instructions to install TWRP and root Redmi Note 8 and Redmi Note 8T via Magisk.
How to Run ADB Fastboot Commands directly on Android without RootHow to Flash Custom ROMs in Android using Web BrowserFlash Custom ROM After Wiping Internal Storage Without SD Card or OTGHow to Flash a Custom ROM without TWRP Recovery
How to Install TWRP and Root Redmi Note 8/8T via Magisk
By now, you are pretty much aware of the perks of carrying out these tasks, But let’s also get you acquainted with the risks involved in doing these tweaks. To begin with, upon unlocking the bootloader, your device’s warranty will become null and void. Likewise, the process will wipe off all the data from your device. Upon rooting, apps like Google Pay might no longer function [though you could hide root and Pass Magisk SafetyNet on Rooted Android]. Furthermore, you might not be able to stream Netflix in HD due to the degradation of WideVine Certification from L1 to L3. If all that’s well and good, then let’s get on with the guide to install TWRP and root Redmi Note 8 and Redmi Note 8T via Magisk. Droidwin and its members wouldn’t be held responsible in case of a thermonuclear war, your alarm doesn’t wake you up, or if anything happens to your device and data by performing the below steps.
STEP 1: Download the Required Files
First and foremost, there are a few files that you need to get hold of. Here’s the download link for all these files as well as the need to flash/install them:
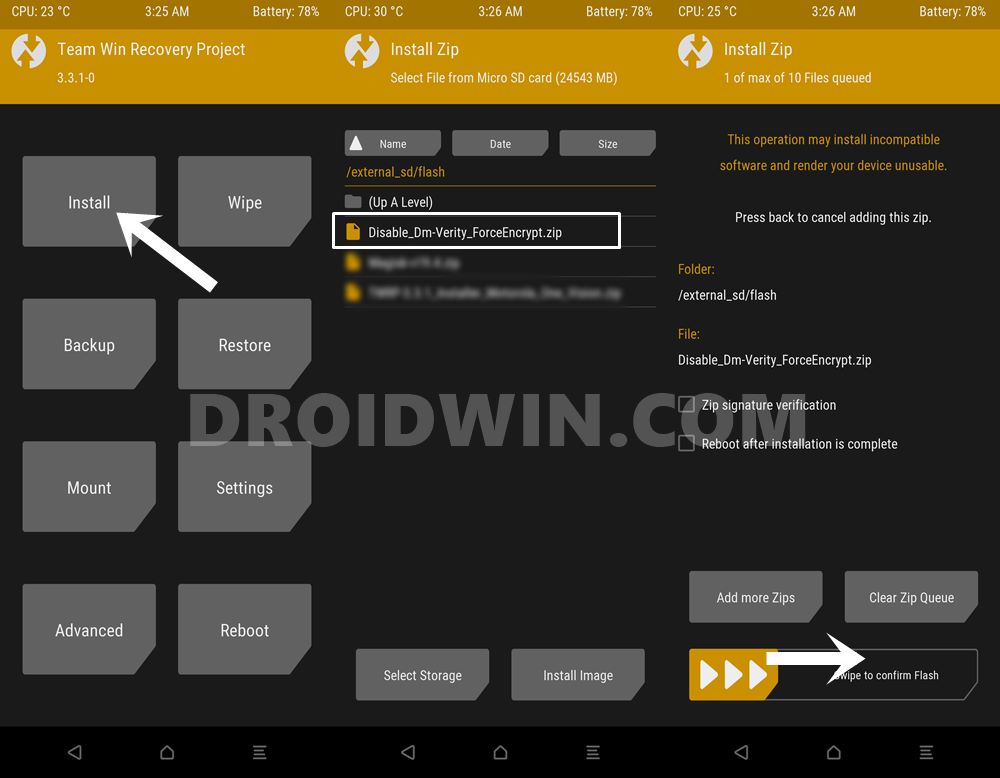
Install Android SDK Platform Tools on your PC: This will provide us with the official ADB and Fastboot binary files from Google. If you have any other third-party tools installed, it is recommended to switch over to this one. Download Disable_DM-Verity: Disable_Dm-Verity_ForceEncrypt_11.02.2020.zip. This will be flashed onto your device to decrypt the data partition. Credits for this file go to XDA Recognized Developer Zackptg5.TWRP Recovery for Redmi Note 8/8T (ginkgo/willow): twrp-3.5.0_9-0-ginkgo.img. This is the unified official TWRP for both these devices.Download the Magisk Installer ZIP to your PC. If you are downloading the latest build (v22 onwards), then there would be just a single Magisk App APK file. To get the ZIP out of it, just change the extension by renaming the APK to ZIP and that’s it!Since both these devices have a dedicated SD Card Slot, it is highly recommended to send the Magisk ZIP file and the Disable_DM-Verity ZIP file to the memory card itself. Or, if you have a USB OTG Pendrive, you may make use of the same as well: How to use USB OTG or Pen Drive to Flash File via TWRP Recovery. Likewise, you may also take the help of ADB Sideload or TWRP Mount feature, as explained here: How To Transfer or Install Files via TWRP Recovery [3 METHODS]
That’s it. These were all the requirements. Let’s now start off with the guide to install TWRP and root Redmi Note 8 and Redmi Note 8T via Magisk.
STEP 2: Enable USB Debugging and OEM Unlock
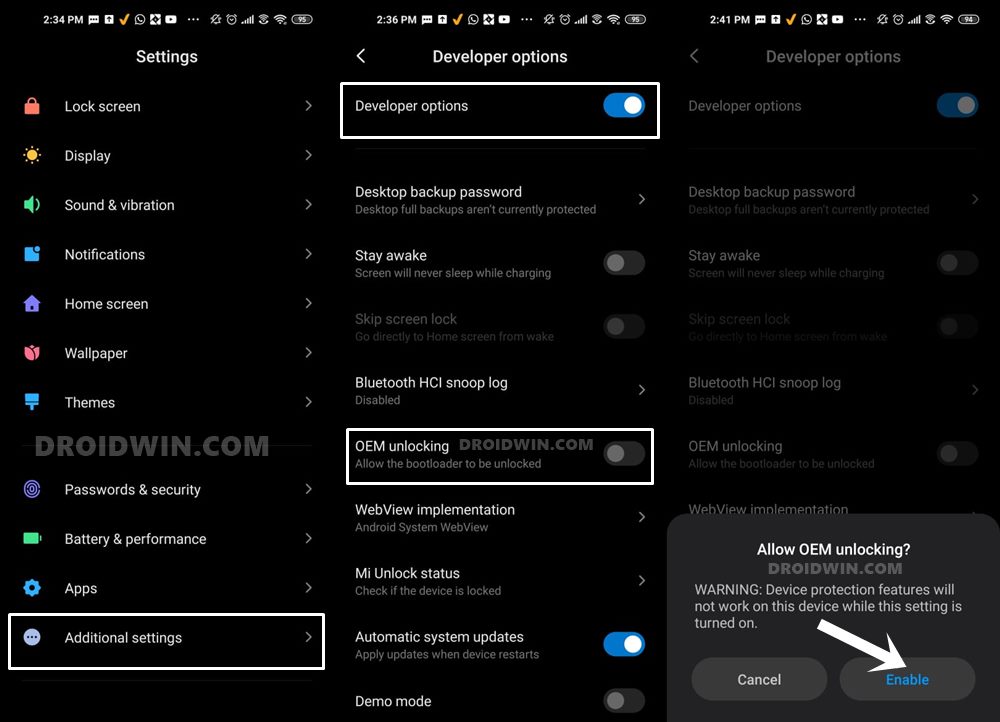
You will have to enable USB Debugging so that your device gets recognized by your PC in ADB Mode. But why ADB? Well, it’s because we will be using this ADB mode to boot your device to Fastboot. On the other hand, OEM Unlock is needed to be enabled so that you are able to unlock the device’s bootloader. So head over to Settings > About Phone > Tap on Build Number 7 times > Go back to Settings > System > Advanced > Developer Options > Enable USB Debugging and OEM Unlock.
STEP 3: Unlock Bootloader on Redmi Note 8/8T
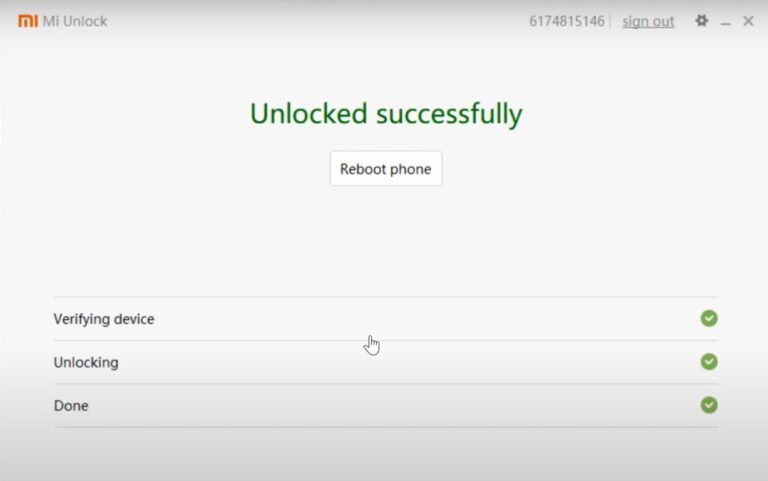
Before you could flash any of the above mods, you will have to unlock the device’s bootloader. This requires enabling OEM Unlock, booting the device to Fastboot Mode, connecting to PC, and clicking Unlock in the Mi Unlock Tool. For detailed instructions on this, please refer to our comprehensive guide on How to Unlock the Bootloader on any Xiaomi Device. Do remember to take a backup beforehand.
STEP 4: Boot Redmi Note 8/8T to Fastboot Mode
Next up, you will have to boot your device to Fastboot/Bootloader Mode. This is because we will be able to install TWRP and root Redmi Note 8/8T only after it has been booted to Fastboot. So follow along for the steps:
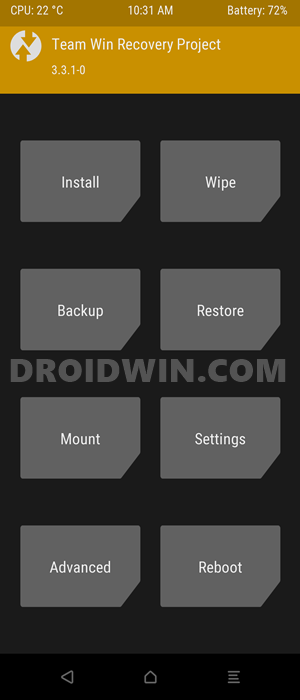
STEP 5: Install TWRP Recovery on Redmi Note 8 and Redmi Note 8T
Let’s now start off with the process to install the TWRP Recovery onto Redmi Note 8/8T. Make sure that the device is booted to Fastboot and connected to the PC via USB cable. Furthermore, the CMD window should be opened inside the platform-tools folder.
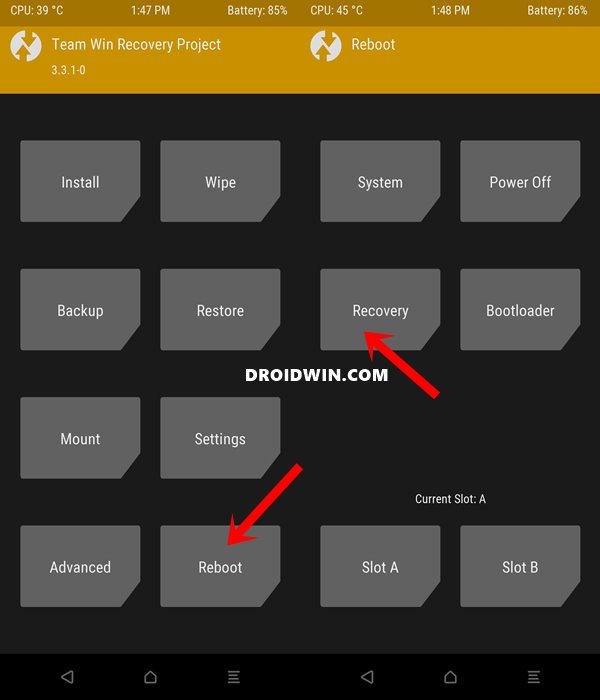
Your device shall now boot to the TWRP Recovery, it’s time to remove encryption before we could root Redmi Note 8 and Redmi Note 8T via Magisk.
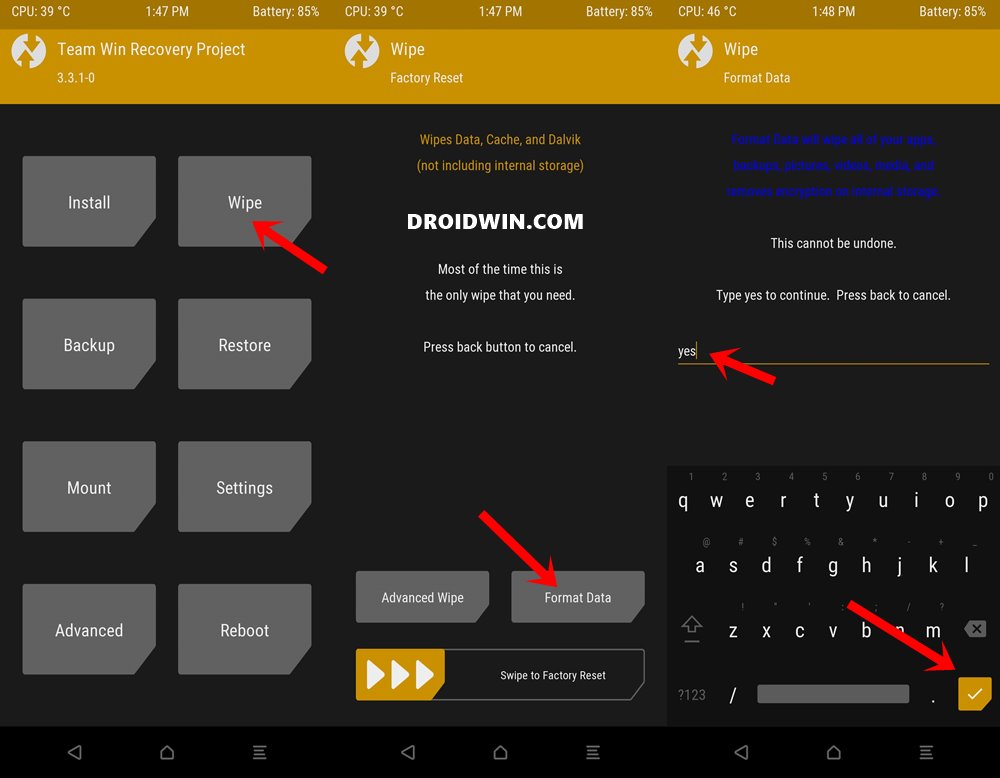
STEP 6: Decrypt Data Partition via TWRP
You will now have to decrypt the data partition so that TWRP is able to read the contents on your device. If you don’t do so, then you might face some issues such as file name being shows as a random string of characters or Internal Memory showing 0MB. So let’s fix these issues beforehand itself! [the below process will wipe the data, make sure to have a backup]:
So with this, we have successfully installed TWRP Recovery. Let’s now turn our attention towards the steps to root Redmi Note 8 and Redmi Note 8T via Magisk.
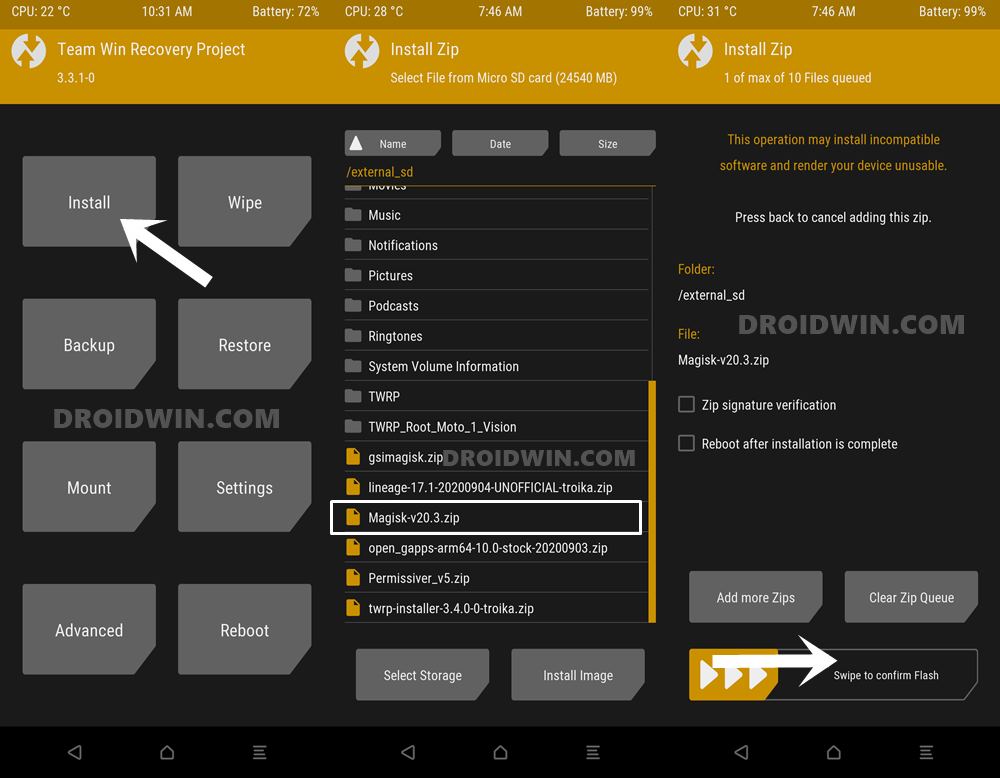
STEP 7: Root Redmi Note 8 and Redmi Note 8T via Magisk
To begin with, transfer the Magisk ZIP file and the Disable_DM-Verity ZIP file to your device. Or if you have already transferred the file to the SD Card or are using OTG, then it’s well and good. So with this, we conclude the guide on how to install TWRP Recovery and root Redmi Note 8 and Redmi Note 8T via Magisk. If you have any queries concerning the aforementioned steps, do let us know in the comments. We will get back to you with a solution at the earliest.
Redmi Note 8/8T Unbrick Bootloop Fix Guides
If at any point in time, you get stuck in a bootloop or soft brick, then you could easily fix this issue, This is possible by flashing the stock firmware via Fastboot Commands. You may refer to our comprehensive guide on this topic: How to Unbrick Redmi Note 8 via Fastboot Commands. On the other hand, if your device gets hard-bricked, then things might get a little bit complicated. This is because Xiaomi now requires an authorized account to flash firmware in EDL Mode. With that said, there do exist a few workarounds that you may refer to :
How to Bypass Xiaomi Account Verification via Mi Unlock ToolUnbrick Redmi Note 7 | Note 8 | Note 9 Series: The Fix?Fix Mi Account Authorization | Unbrick Xiaomi | EDL Mode?Download Patched Firehose File (prog_emmc_firehose.mbn) for 600+ Android Devices
About Chief Editor