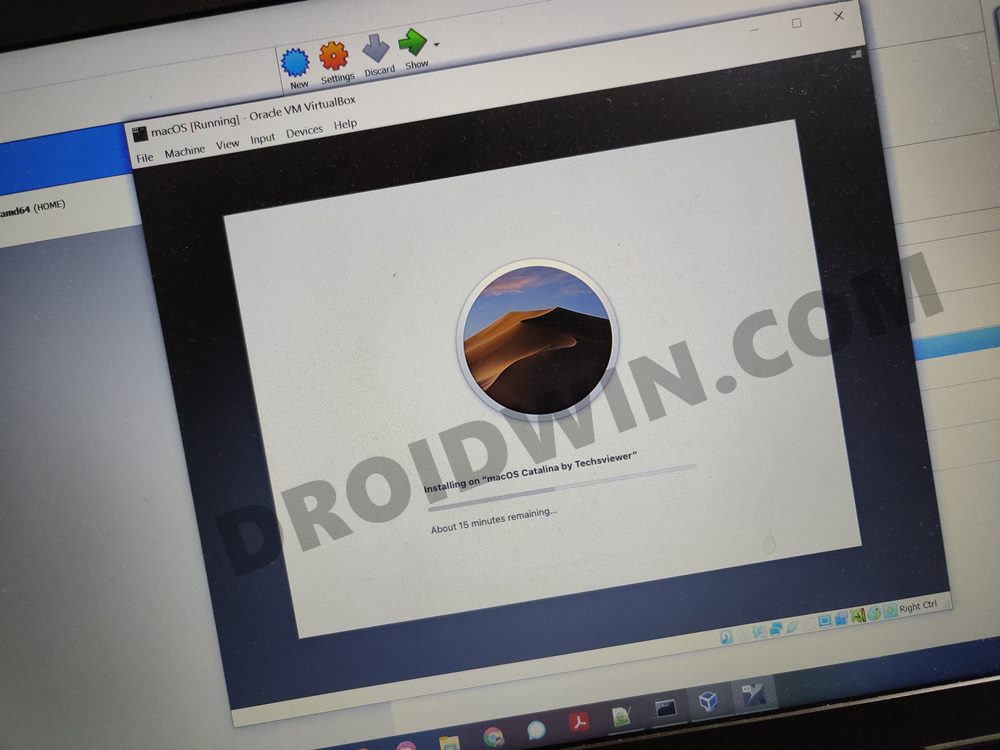
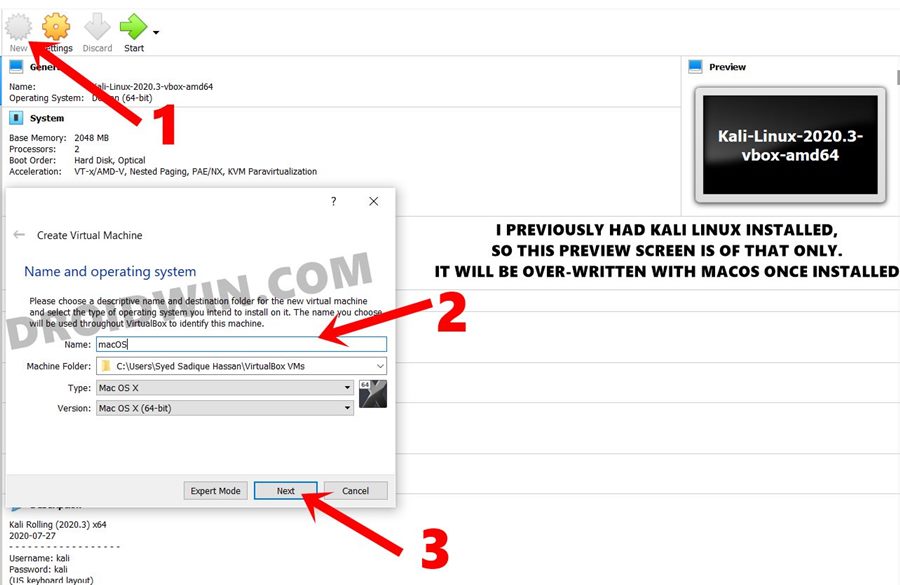
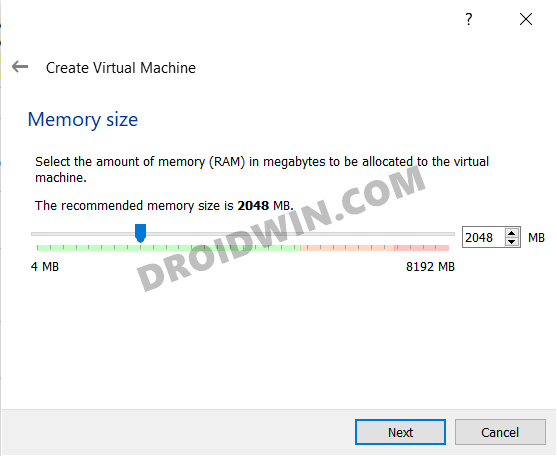
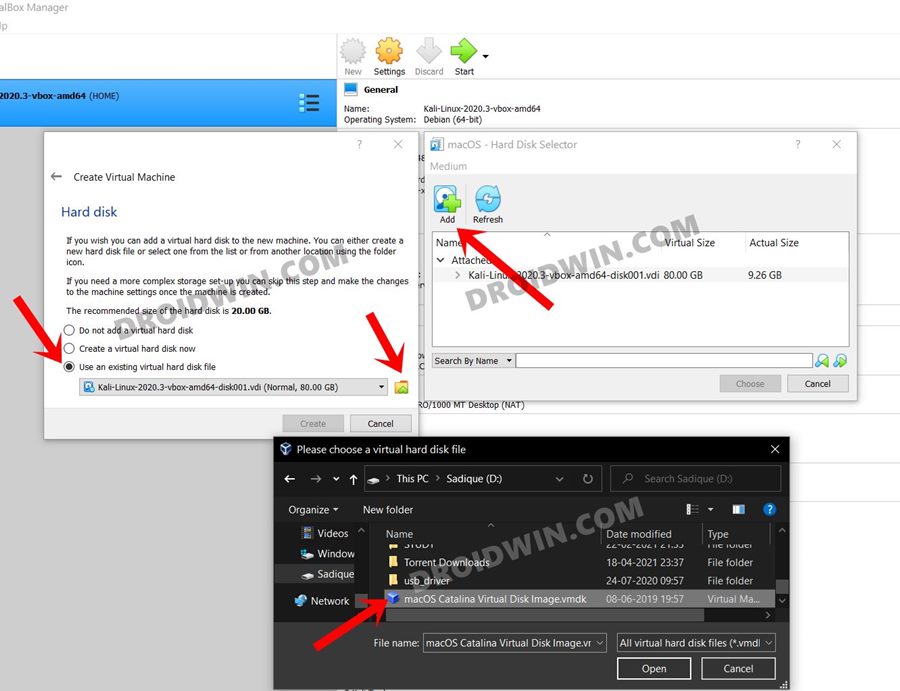
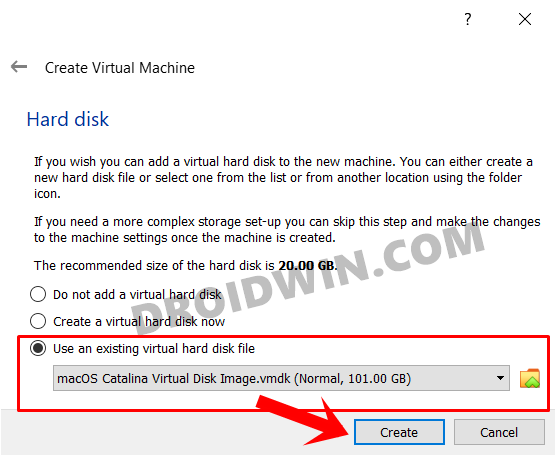
But even then, there could always arise a need where the former user might have to take a helping hand from the latter one. This situation arises more so in my area of expertise since I have to regularly cover write-ups for both the OS. And this is what gave rise to this article. Today, we will show you the steps to install macOS on your Windows 10 PC that will allow you to run Mac apps as well. So without further ado, let’s get started.
How to Uninstall Apps on Windows 10 using Command PromptHow to Run Linux Commands in Windows 10 [without Virtual Machine]Unlock Hardware and Devices Troubleshooter in Windows 10How to Enable gpedit.msc Local Group Policy Editor in Windows 10 Home
How to Install macOS on Windows 10 and Run Mac Apps
Before we list out the instructions, let’s make you aware of the basic requirements that your PC needs to qualify. Do keep in mind that you would still be able to install macOS even if your PC doesn’t qualify these requirements, but it would be quite slow to be used as your daily driver.
Minimum Prerequisites
A PC or laptop running Windows 10 (might work on Windows 8/7, but I haven’t tested it on those versions).Minimum 8GB RAM (For RAM allocation to macOS, make sure not to exceed 50% of your total RAM. For example if you have 8GB RAM, then you could allocate anywhere between 2-4GB).100GB or more free Disk Space (some space will be used by the macOS, others by the apps that you install). You could delete the macOS and regain all your space any time you want.A good WiFi connection that could download around 6.5GB of file with ease (6GB is for the macOS ROM, the rest will be used by a couple of other software.
So if that is all well and good, then you may proceed with the below steps to install macOS on your Windows 10 PC.
Downloads
First off, download Oracle’s Virtual Box for your Windows PC. This is an emulator software that will be used to run macOS onto your Windows setup.Next up, download the Virtual Box Extension Pack. This is an add-on that will make it possible for the keyboard and mouse to function on your macOS properly. Likewise, it will also enable support for USB 3.0.Finally, download the macOS Catalina Virtual Machine IMG file [Credits: MakeUseOf]. This is the ROM file that will be loaded onto the Virtual Box in order to run the macOS and Mac apps onto your Windows 10 PC.
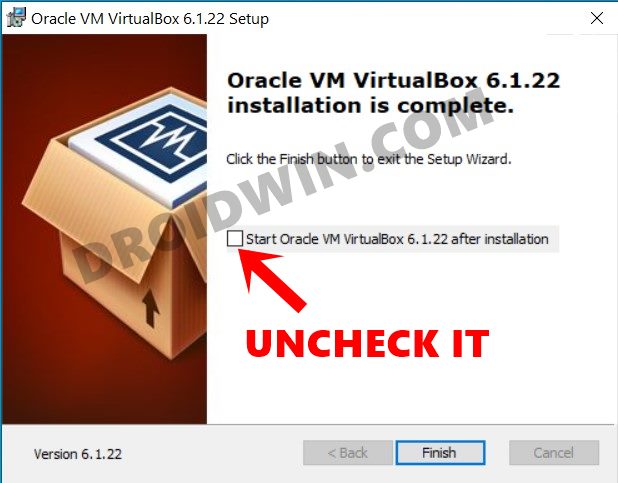
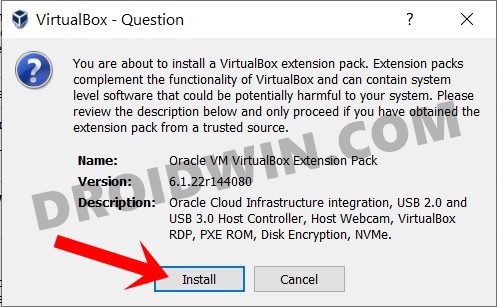
STEP 1: Install the Required Files
That’s it, these were the required files that were needed to be downloaded/extracted. You may now proceed with the instructions to run the macOS and Mac apps onto your Windows 10 PC.
STEP 2: Setup Virtual Box for macOS on Windows 10
STEP 3: Optimize macOS Catalina Virtual Machine for Windows 10
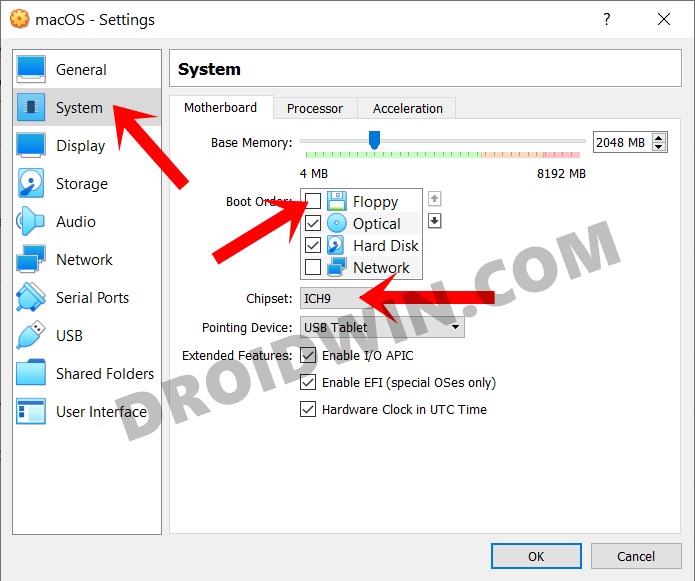
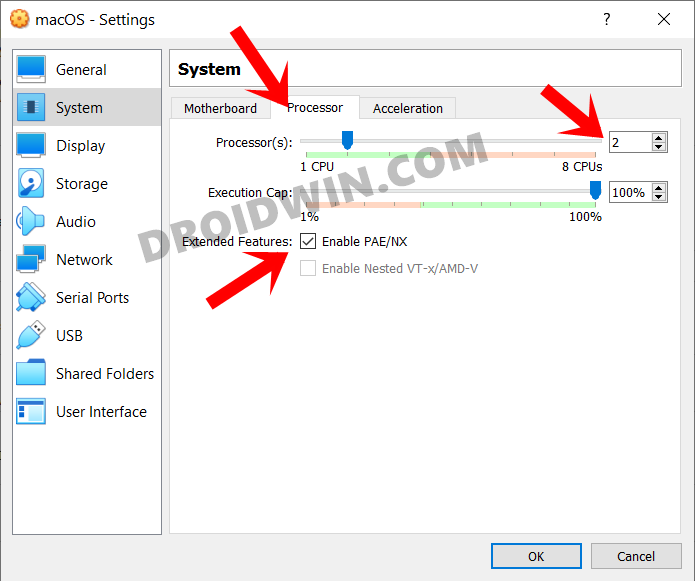
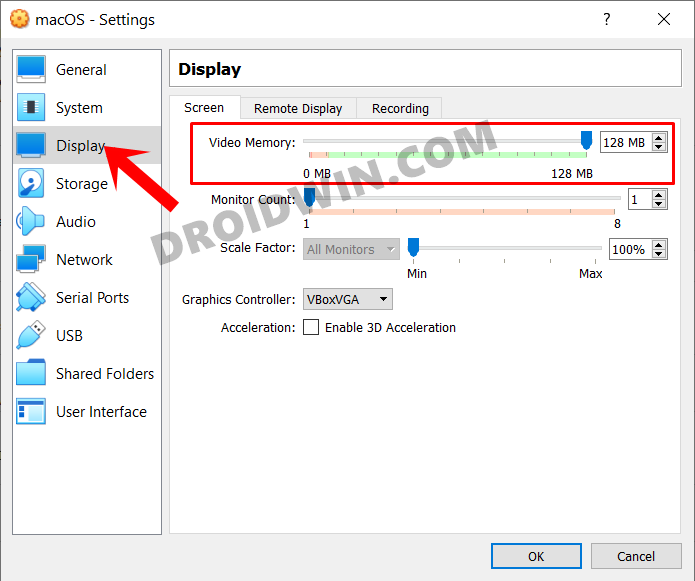
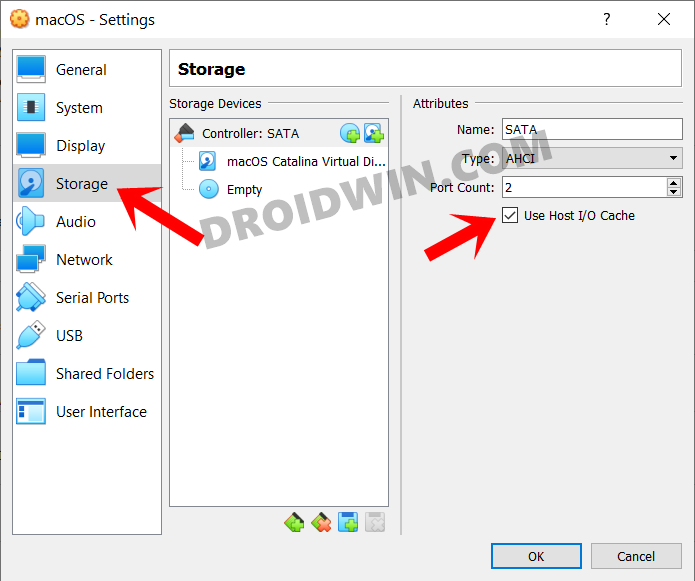
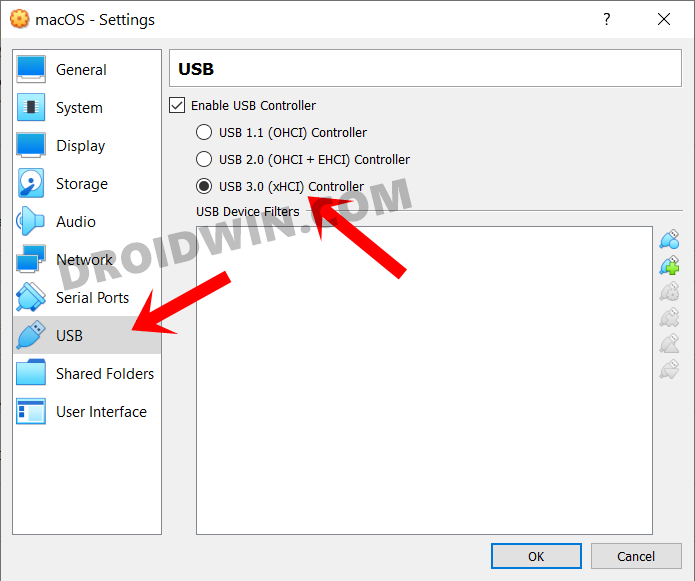
We will now be tweaking the VM settings so that macOS is able to install and run in the most efficient manner. Follow along. The setup is now complete as well. Let’s now add a few lines of commands to add the finishing touch that will easily allow you to run macOS and Mac apps onto your Windows 10 PC.
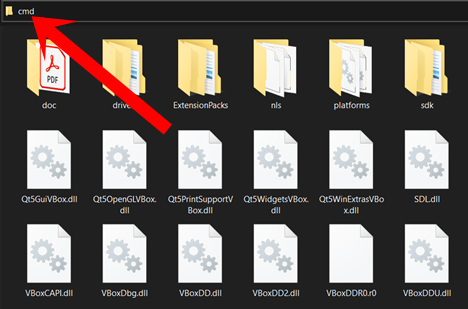
STEP 4: Add Virtual Machine Codes for macOS
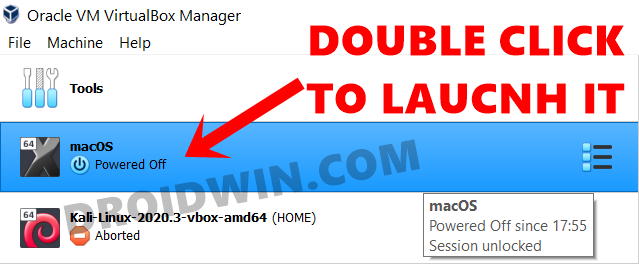
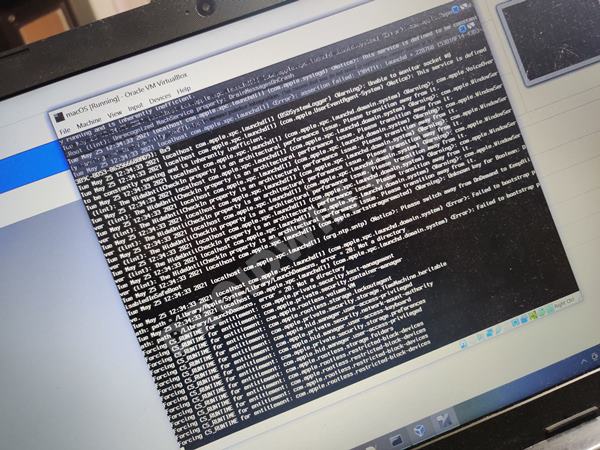
STEP 5: Boot your Windows 10 PC to macOS
STEP 6: Shutdown macOS Virtual Machine on Windows 10
So on that note, we conclude this guide on how you could install macOS and run Mac apps onto your Windows 10 PC. If you have any queries concerning the aforementioned steps, do let us know in the comments. We will get back to you with a solution at the earliest.
About Chief Editor
